A brief introduction on use of Trello for LPDC reporting
Overview
Everyone participating in the Management Council LPDC will be provisioned with a project management board. Utilize this board to track and report your licenses, plan, and activities.
The biggest advantage over the previous "email it in" reporting system is visibility – you can see exactly what you have submitted on your project board. Other than LPDC committee members, you are the only person who can view or edit your individual project board. It is yours to maintain!
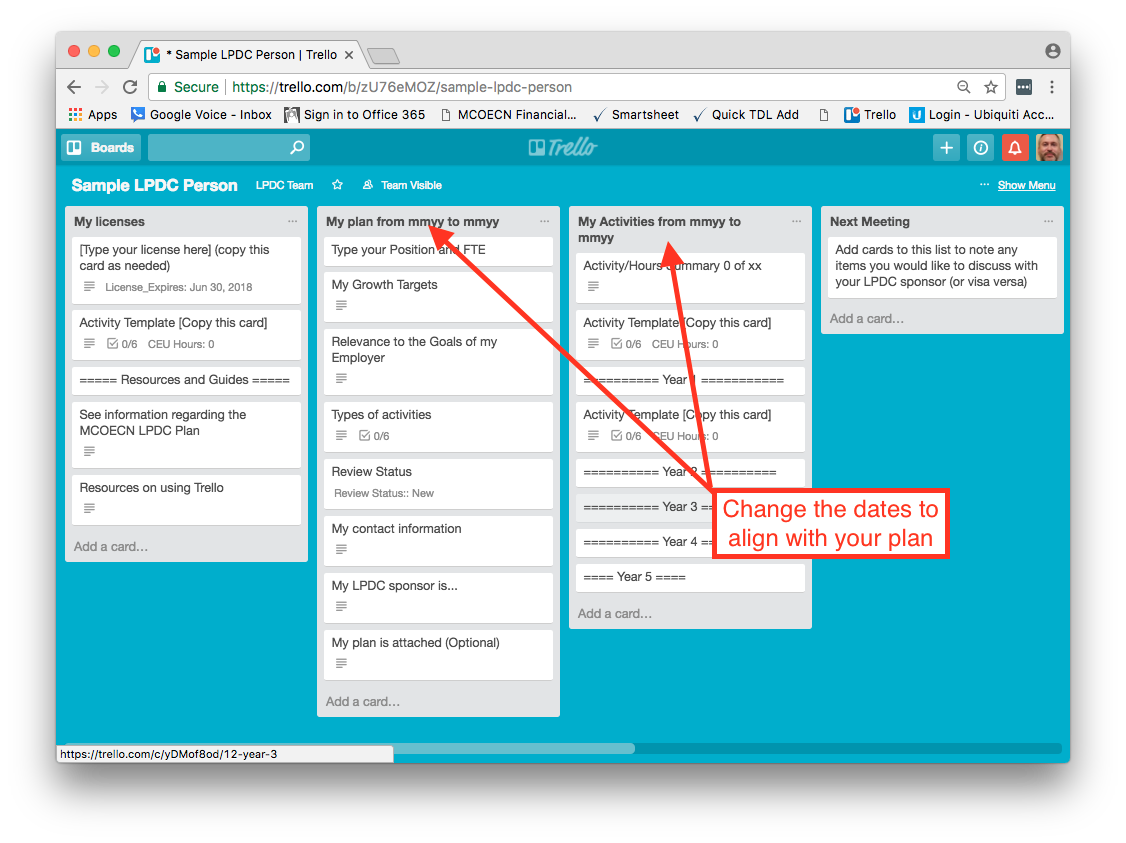
An LPDC project management board looks like this:

Your board will have your name, ITC, and renewal date. This information will be managed by the LPDC administrator.
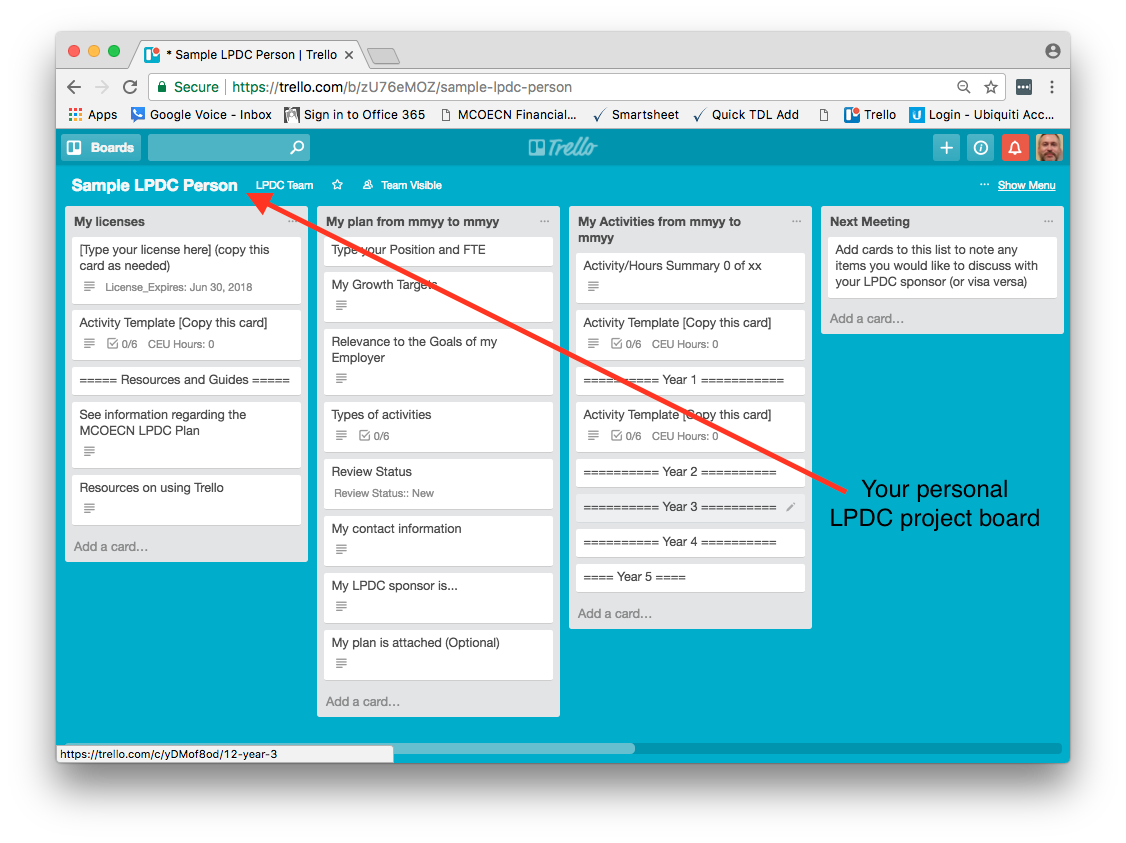
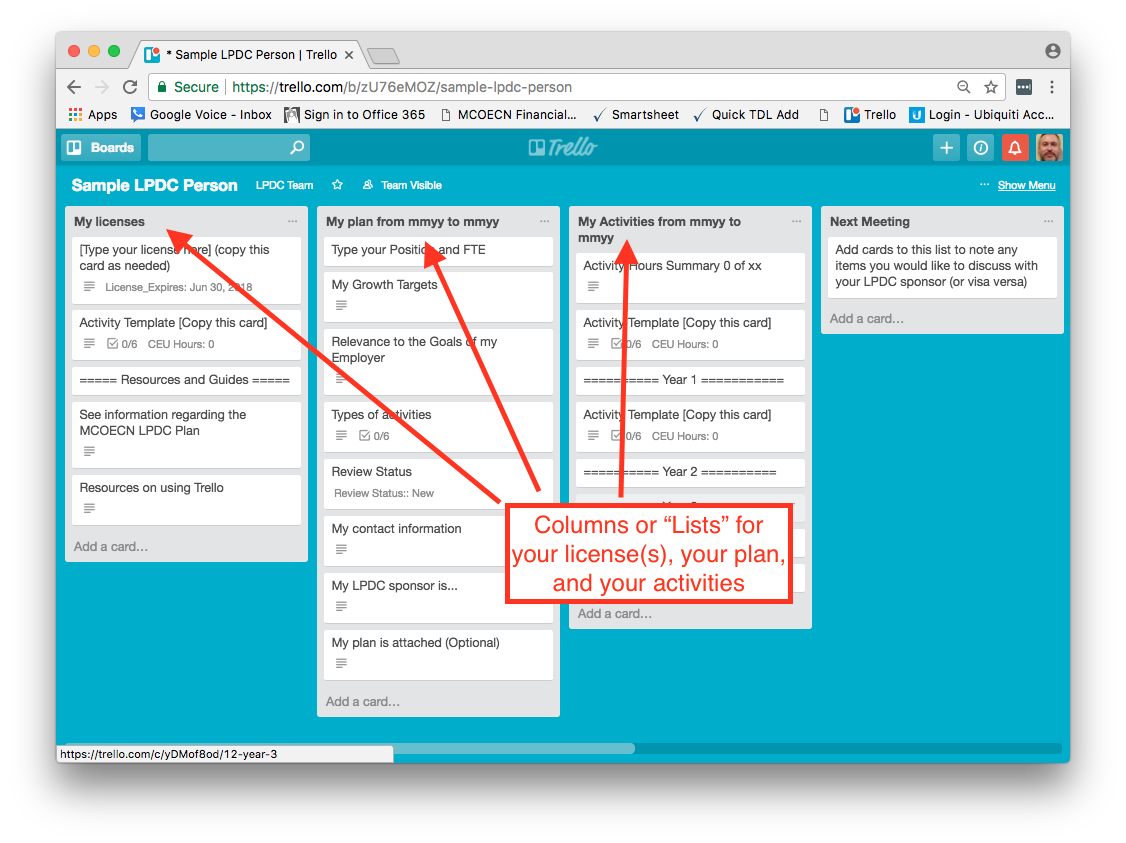
Your LPDC project board will contain areas to maintain your licenses, your plan, and your activities
Step-by-step guide
Getting started:
- Each LPDC participant will receive an invitation to "join" their individual LPDC project board. Boards will be distributed in waves based on license renewal year, starting with individuals who renew in FY18. You'll be notified by email when your board is ready for access.
- Click the link in the invitation to create your Trello account and access your project board – be sure to retain your password! [See this video]
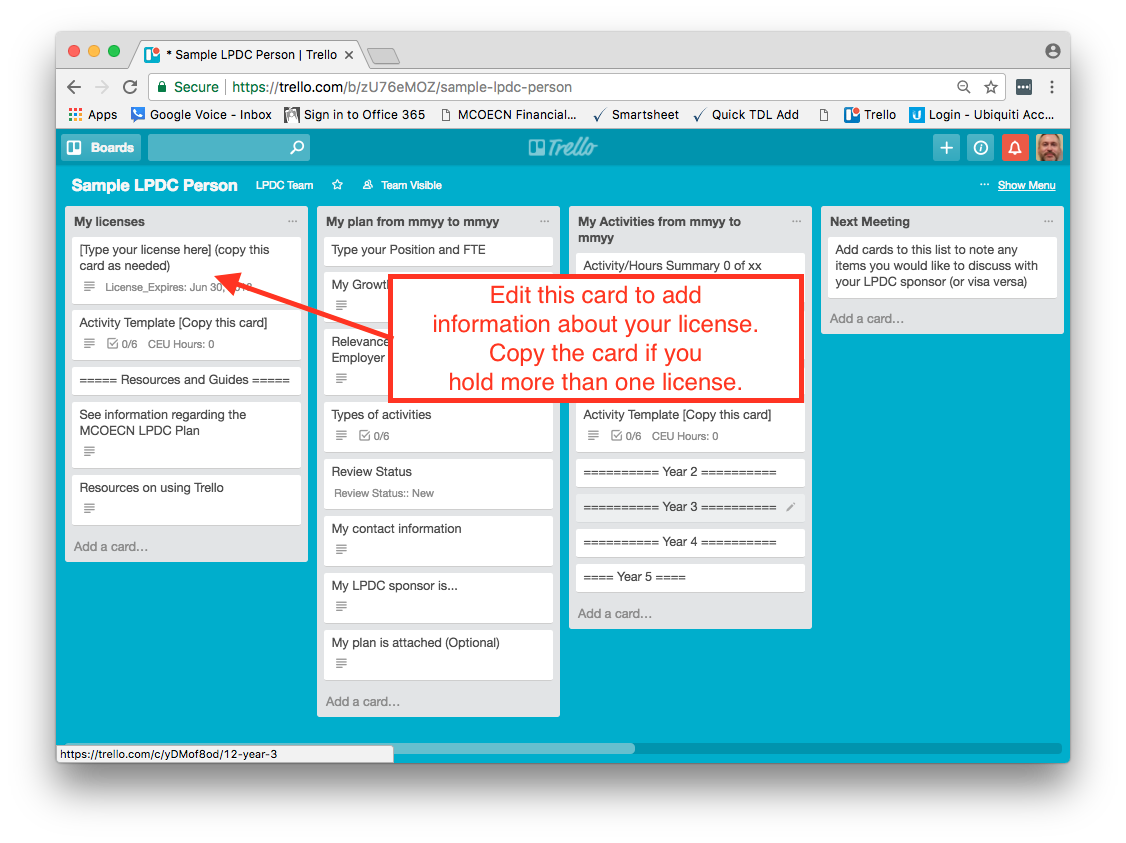
- Once you have access to your individual board, the first step is to add your license information. [See this video]
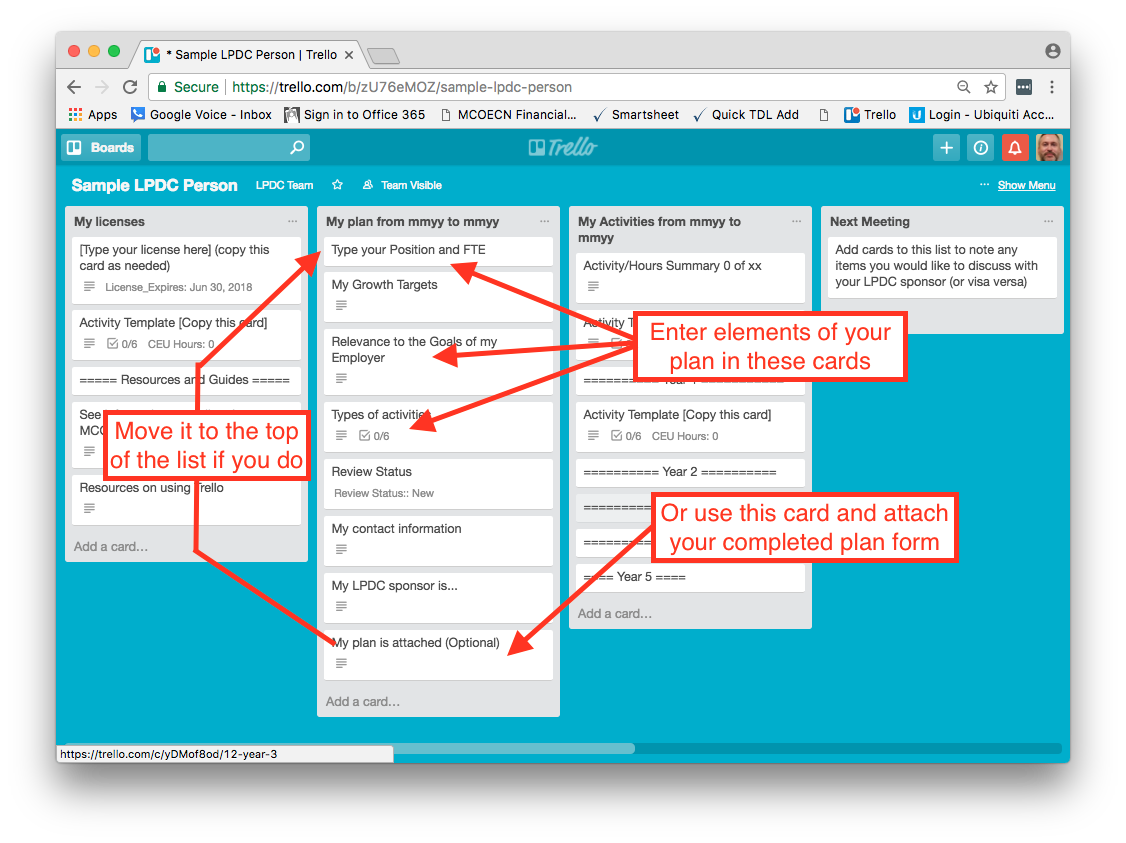
- Update your plan information [See this Video], or alternately, attach your completed plan form to a card. If you attach your plan, you may want to move that card to the top of the list.
- Change the dates to correspond to the starting and ending dates of your plan. Simply click on the name of the list to edit.
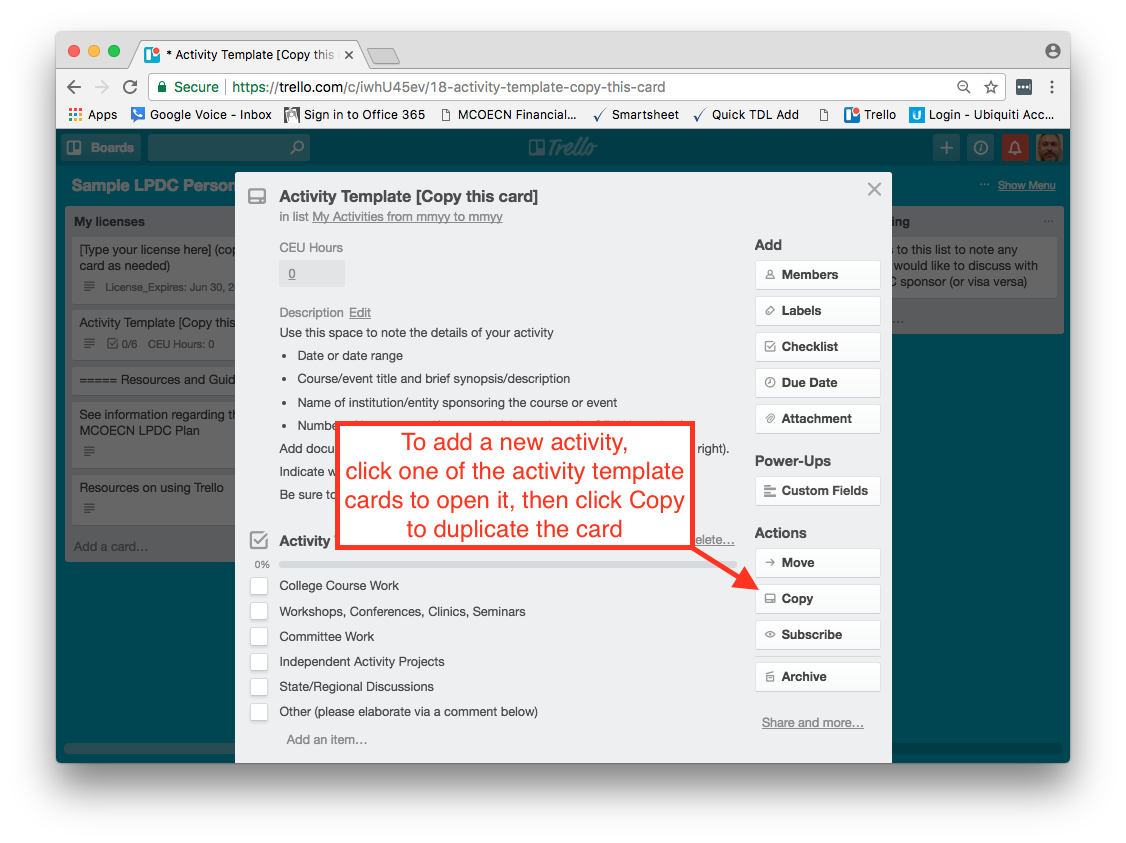
- To add activities, click to open one of the Activity Template cards. Then click "Copy" from the right-hand menu [See this video]
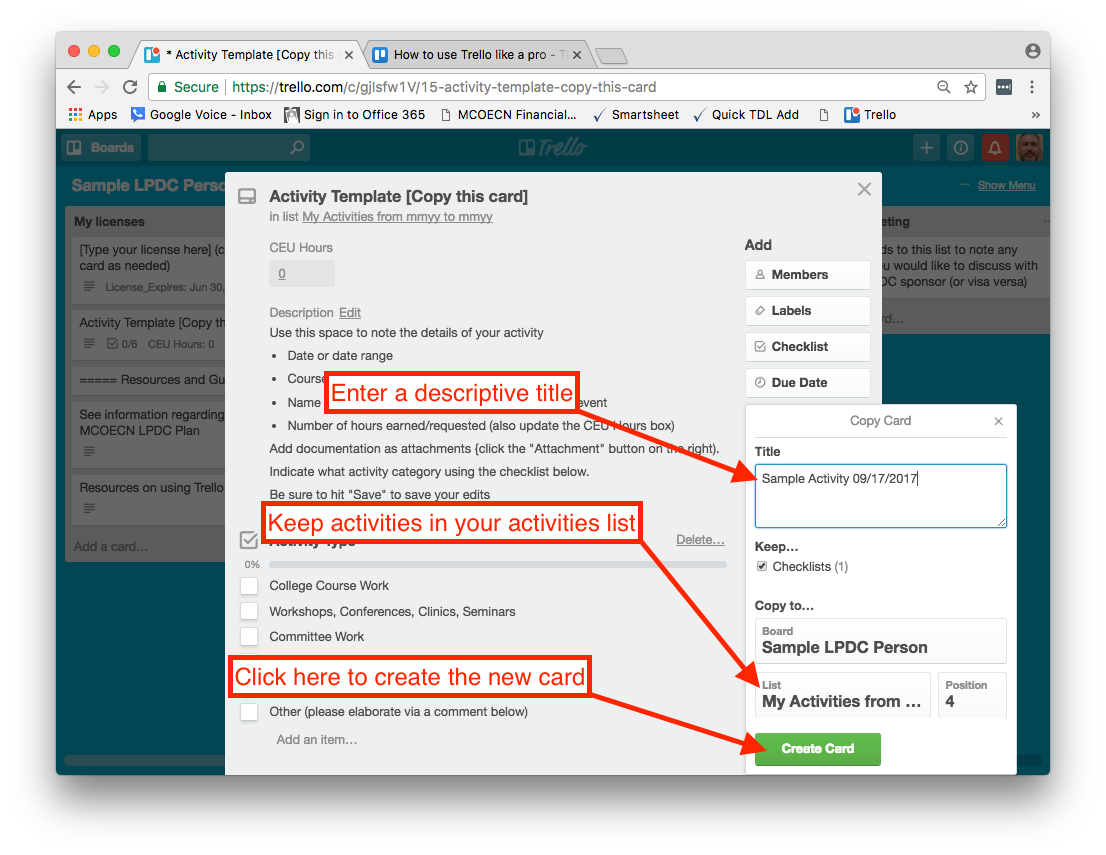
- Enter a title for the card – something relevant to the activity. Keep the card in your Activities list.
- Click to open the new card, then update the description, CEU hours, and activity type. Add supporting documentation by clicking on the "Attachment" menu button.
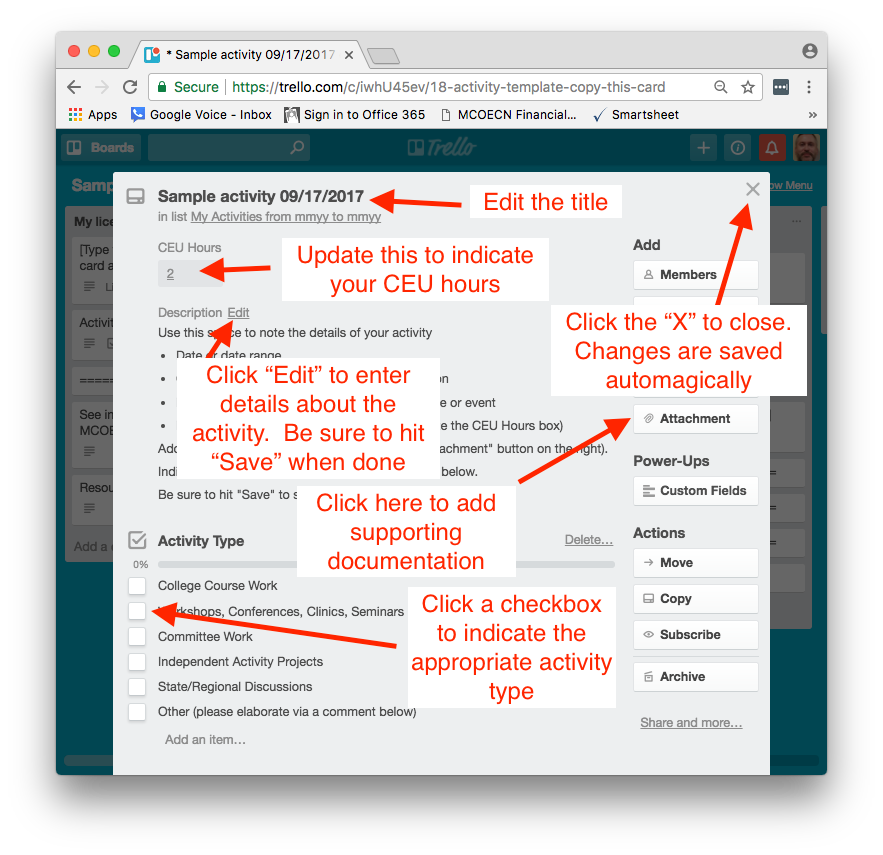
- Click the "X" to close the card. Your edits will be saved automatically.
Related articles
There is no content with the specified labels